In our interconnected and globalized world, it has become crucial for modern applications to support multiple languages. In this section, we’ll dive into the art of implementing multi-language support in your React application, opening doors to diverse user communities. Let’s explore how we can achieve this feat using internationalization (i18n) libraries such as react-i18next or react-intl. We’ll cover everything from setting up language files to seamlessly switching between languages and effectively handling translations within your components.
Step 1: Choosing the right i18n library
To begin, select an i18n library that best suits your application’s requirements. Two popular options are react-i18next and react-intl. While react-i18next provides a powerful and flexible solution with its hooks-based approach, react-intl offers a rich set of components and tools for managing translations. Consider your project’s needs and decide accordingly.
npm install react-i18next i18next
Step 2: Setting up language files
Next, create language files for each supported language. These files will contain the translations for your application. You can structure them in a key-value format, where the keys represent the original language and the corresponding values hold the translations. Organize these files within a dedicated folder, such as “locales,” to maintain a clean project structure.
Create language files for each supported language, such as en.json and es.json. Place these files in a folder named locales in the root of your project.
// en.json
{
  "greeting": "Hello!",
  "buttonLabel": "Click me!"
}
// es.json { “greeting”: “¡Hola!”, “buttonLabel”: “¡Haz clic aquí!” }
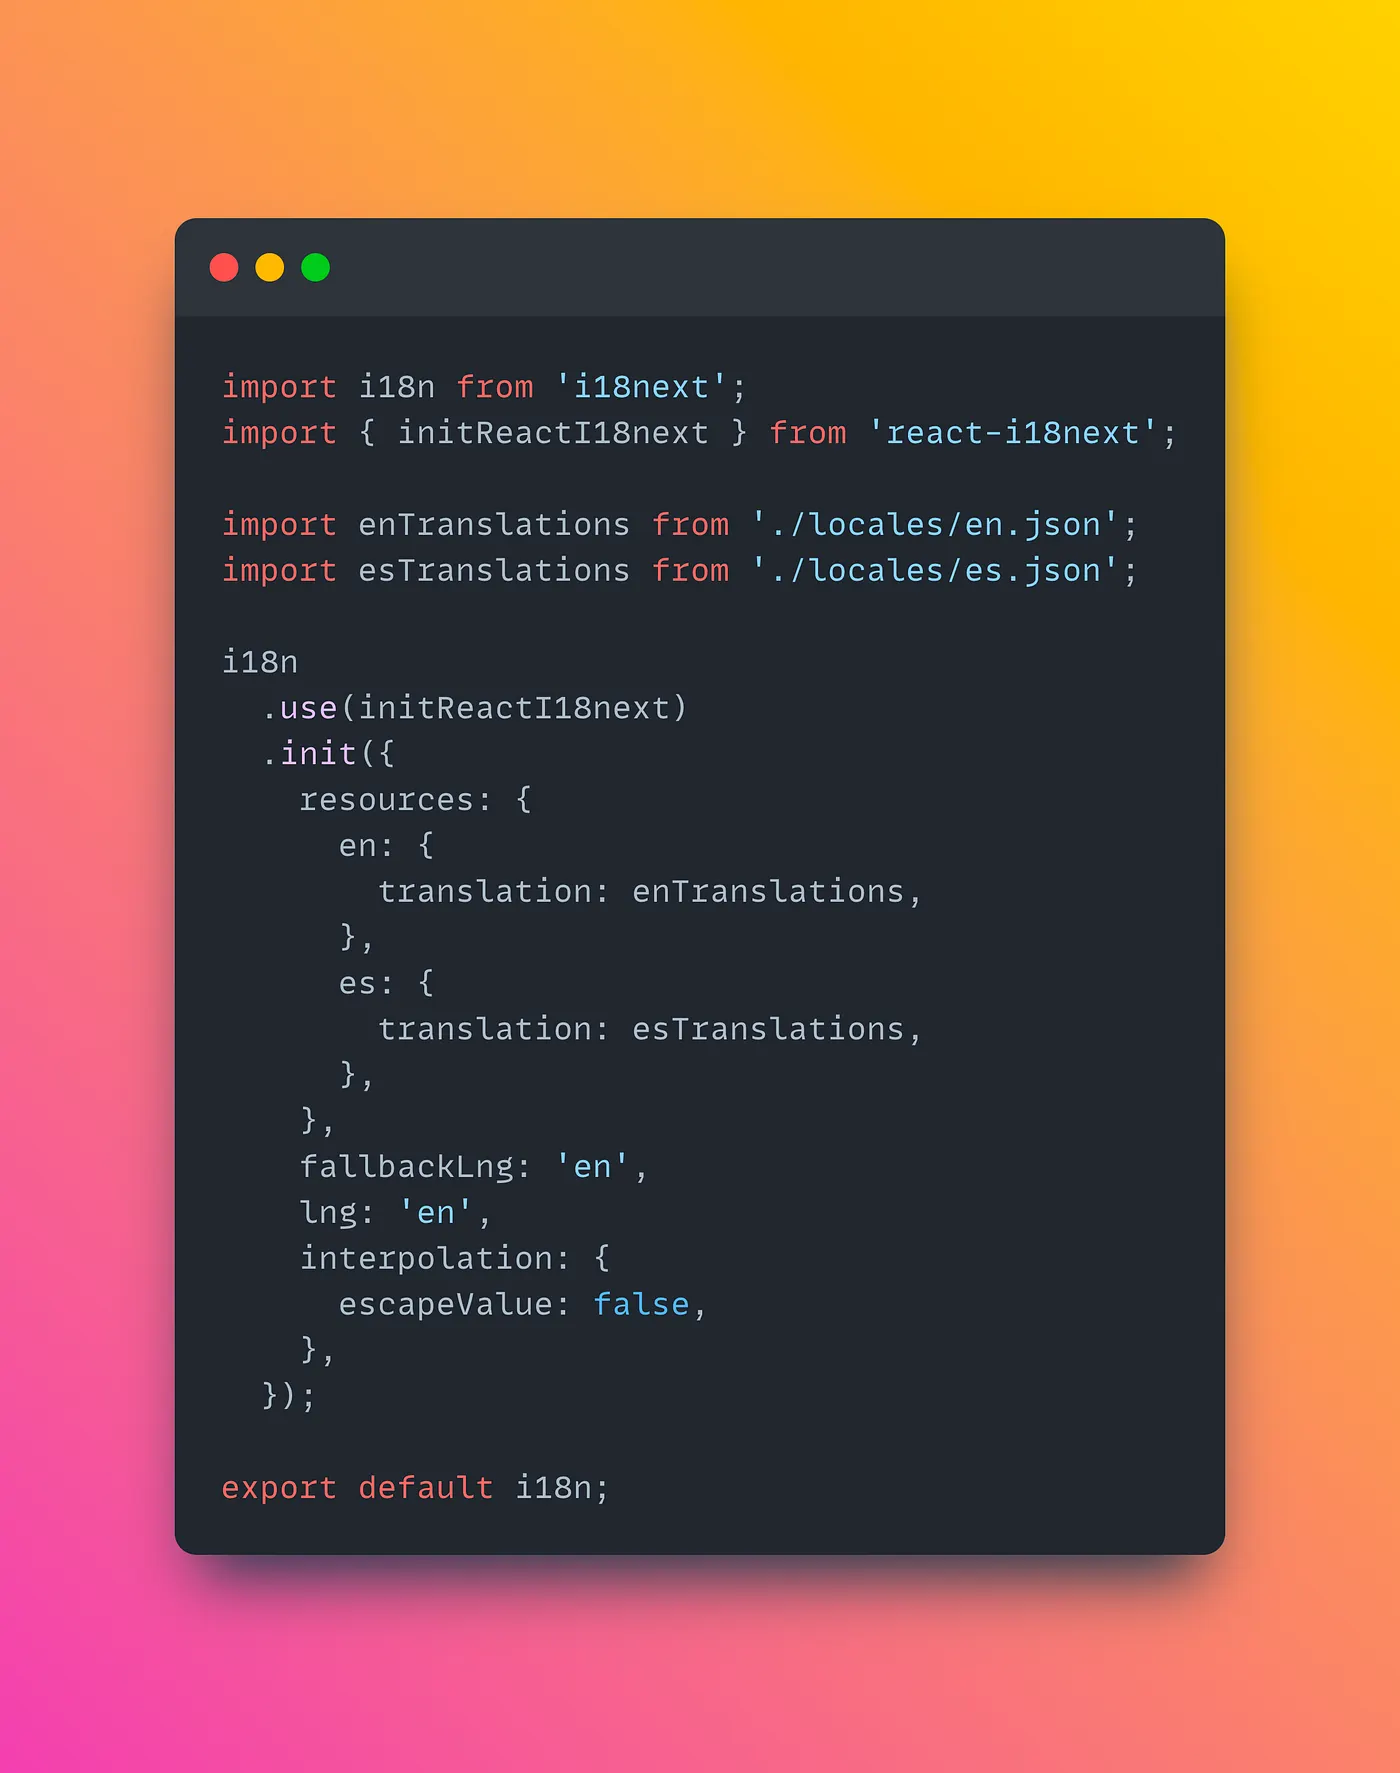
**Step 3: Configuring i18n library**
Configure your chosen i18n library to integrate it with your React application. This usually involves providing the library with the necessary configuration options, such as language detection, fallback language, and loading translations from the language files we created earlier. Consult the documentation of your selected library for specific implementation details.
Create a configuration file for i18next, such as `i18n.js`, where you define the configuration options.
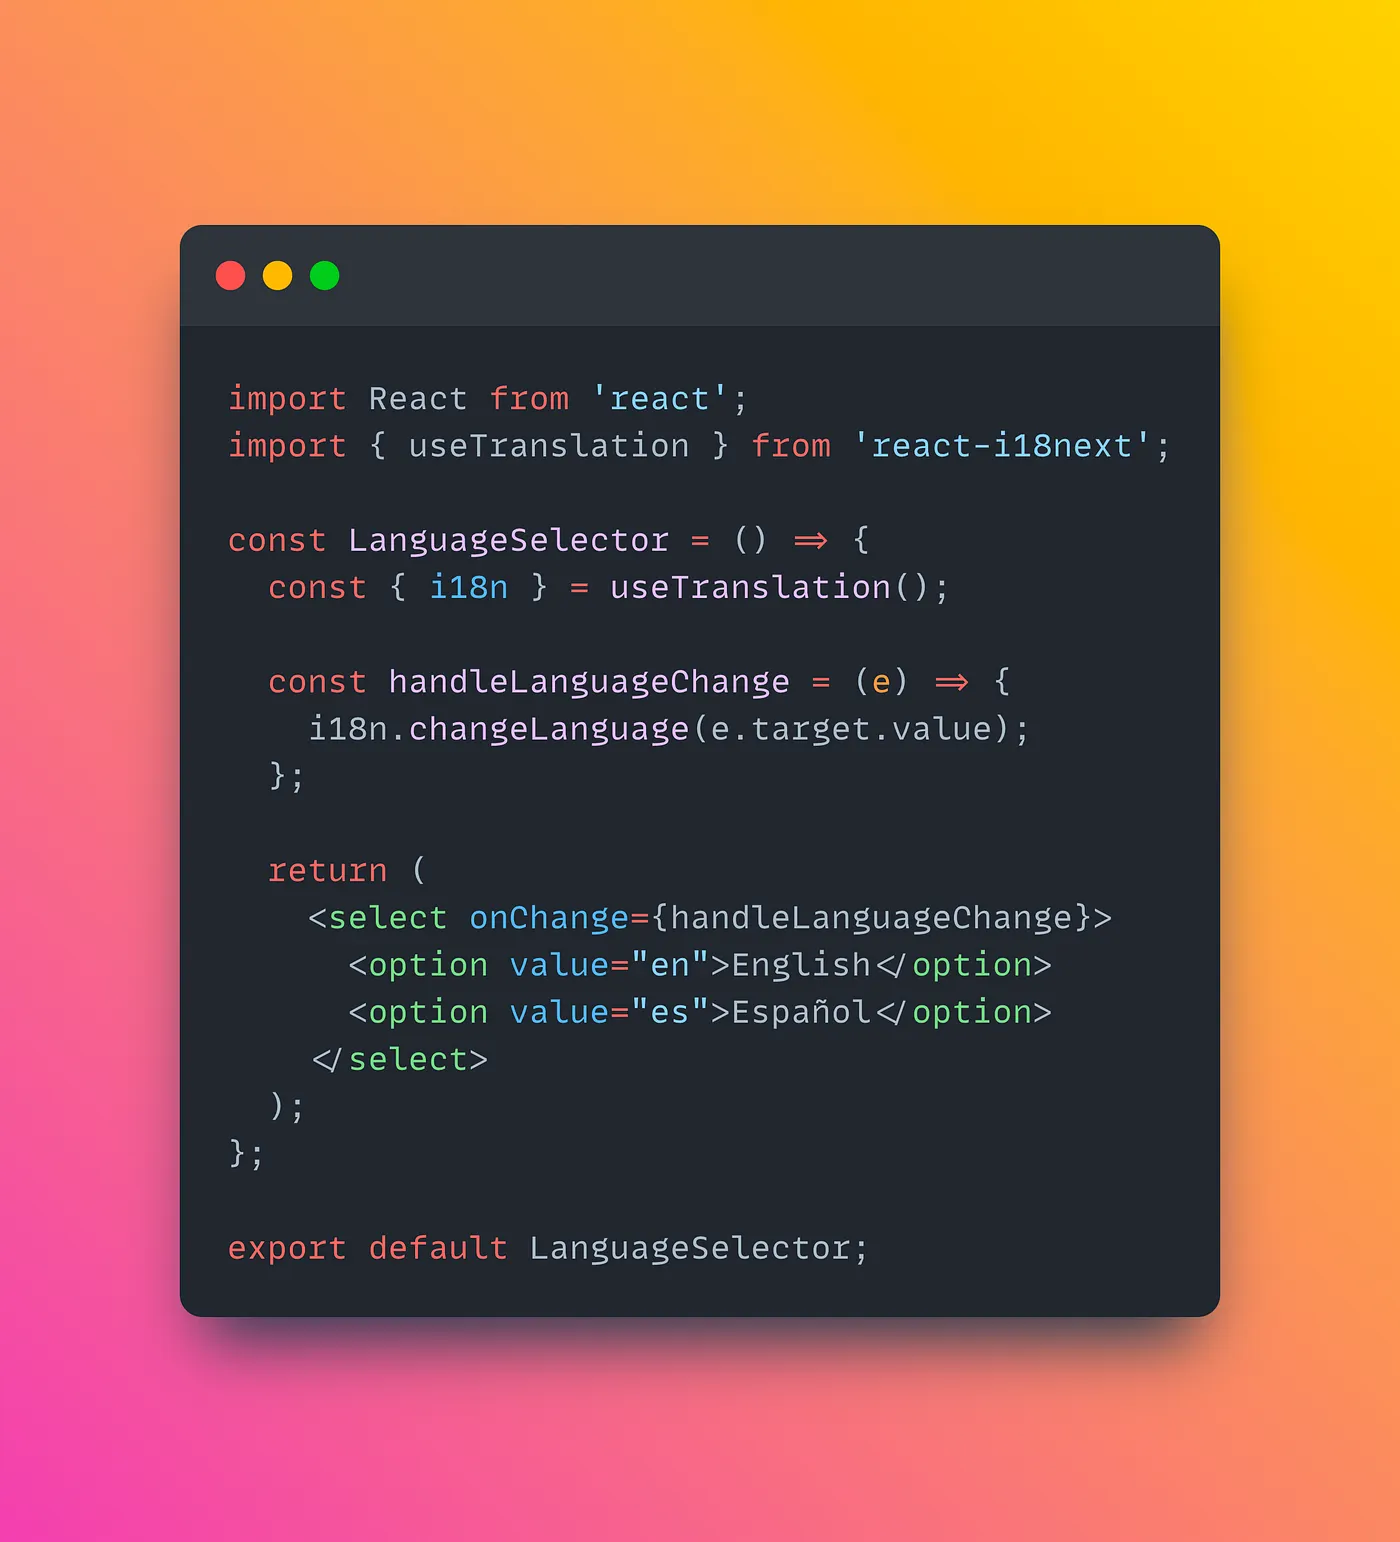
**Step 4: Implementing language switch functionality**
To enable users to switch between languages, create a language selector component. This component can display a dropdown, a set of flags, or any other visual representation of available languages. When a user selects a new language, update the i18n library’s language setting accordingly. This triggers a re-render of your application with the selected language’s translations.
Create a LanguageSelector component that allows users to switch between languages.
LanguageSelector.js:
**Step 5: Handling translations within components**
Now comes the exciting part: utilizing translations within your React components. Most i18n libraries provide convenient functions or hooks to access translations. Use these tools to retrieve the translated strings based on their corresponding keys. Ensure that you wrap your components or specific parts of your application with the necessary i18n provider or context to make translations accessible throughout the component tree.
Use the `useTranslation` hook to access translations within your React components.
App.js:
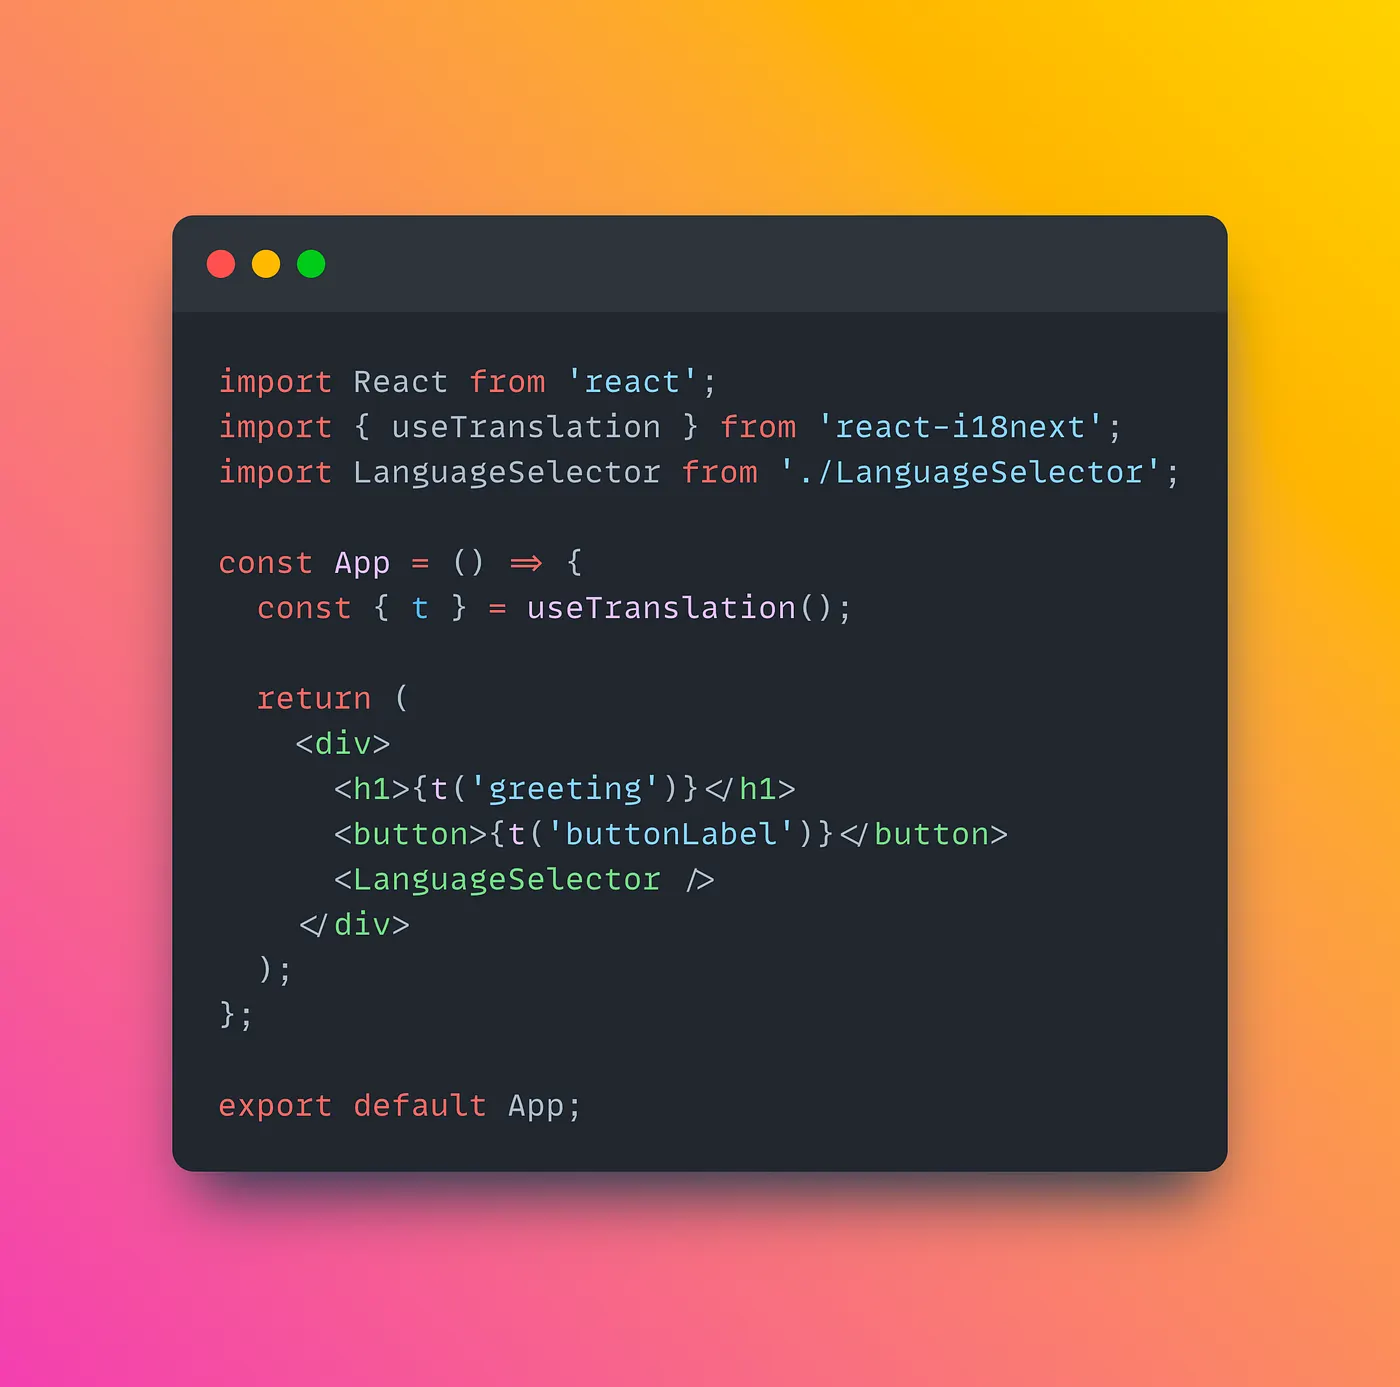
This is just a basic implementation. You can expand upon it by adding more languages, handling dynamic content, and customizing the language selector as per your application’s needs. Remember to wrap your application with the `I18nextProvider` component and import the `i18n.js` configuration file at the root level of your application.
**Step 6: Testing and refining**
Finally, thoroughly test your multi-language support implementation. Verify that translations appear correctly, check for any edge cases, and ensure a smooth user experience across different languages. Continuously refine and improve your translations based on user feedback, and regularly update your language files to keep up with evolving requirements.
By incorporating multi-language support into your React application, you open up your software to a broader audience, enhancing accessibility and user satisfaction. Empower users from various linguistic backgrounds to engage seamlessly with your application, breaking barriers and fostering inclusivity in the digital realm.